Happy Mother’s Day

Today we celebrate the rewarding, demanding, and sometimes overlooked state of being that is Motherhood. I’ve heard that Motherhood can be thankless at times, but today I’d like to say Thank You to all the mothers out there. To the mothers who have to deal with snot, spit-up, dirty diapers, and all other manner of messy bodily fluids — Thank You. To the mothers dealing with teen angst and rebellion — Thank You. To the mothers trying to juggle work and/or school and/or personal relationships and a family — Thank You. To all mothers — Thank You. To my mom — Thank You.

I thank my mom for being my original inspiration to get into craftiness. When I was a child, she liked to sew me outfits. One of my sources of pride when I was little was the new Halloween costume that she’d sew me every year. My favorite as a kid was when she dressed me up as a China doll. I don’t think I ever wore the same costume twice until I was in mid to late high school and by then I was making my own. The sewing skills I used for my costumes – I learned from my mom. I can still remember the plain rectangle bag that she taught me to make. It was my first project using a sewing machine. She also taught me how to sew by hand which I still use frequently. Another craft she introduced me to was cross-stitching. This is one I stopped doing, though I still know how. She also inspired my brief foray into scrapbooking. I still enjoy looking at the scrapbooks she’s put together: her baby/childhood pictures, my baby pictures, etc. I have an unfinished scrapbook sitting in a tote that I’d like to eventually work on. It seems I don’t have the patience or artist inclination that scrapbooking takes. Shame. She’s done other crafts like quilting and I received a soap-making kit that she wasn’t using anymore.

The time and energy that a crafting mom takes to make things for her kids or to teach them how to craft themselves is a precious thing. I don’t have children yet, but they already have a small box of baby things I’ve made (^_~ lol). I’m not pregnant and this has caused a fair share of funny looks from people who see me making baby things. An example: My bookbinding class. For my final project I made a pregnancy journal and of course some of my classmates asked if I was expecting… Nope. Again in my felting class. My final project was a maternity cardigan. Still not pregnant. I’ve even gotten funny looks and comments from my family until they got used to it. Whenever I see babies or really little kids, I smile. Even if they’re crying or throwing a tantrum. The idea of making things for my future kids to cherish also makes me smile. I figure that by the time I get pregnant I’ll have a bunch of things I won’t have to buy or hurriedly make all at once. Blankets, going-home outfits (different depending on if it’s a boy or girl), hats, booties, soft toys, nursing covers, diaper bags, travel changing pads, etc. Would it be easier and probably cheaper to just buy some of these things – especially considering how fast they’ll grow out of some of them? Yeah probably. But I won’t get the same satisfaction out of them. And who knows? Maybe someday my kids will make their own blogs. And maybe some Mother’s Day they’ll say Thank You.

As a little treat, I’ll let you in on some delicious yarn I just bought.

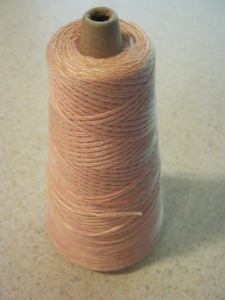
Peachy cotton and silk

Peachy cotton and silk

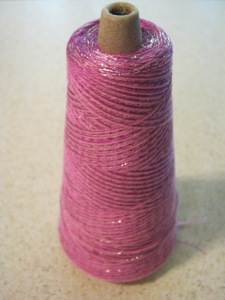
Bright merino wool, silk, and lurex (the shiny bit)

Bright merino wool, silk, and lurex (the shiny bit)

These lovely yarns were designed by me at Yarnia. This amazing shop also offers their custom yarn creator online HERE . I don’t really care much for the color pink (in its many forms), but… I think I know someone who does ^_~


Ginger and Anise Seed Soap

A new adventure on my crafting journey: milled soap. Apparently this is different from regular soap… I’d never heard the term until I discovered instructions on how to do it in my mom’s book The Complete Soapmaker by Norma Coney. To try it, I’m using my most recent batch of handmade soap (cold process pure olive oil).

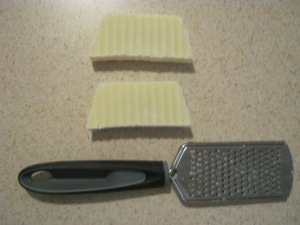
001To start, I’m using about 3.6oz of soap (two pieces seem like a good test amount) and a Dollar Tree cheese grater. The grater is perfect for this (and cheap enough to use only for milling soap ^_~)!

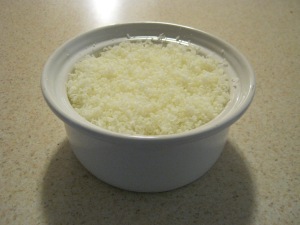
grated soapThe two pieces, when grated, filled my ceramic fondue bowl (bought just for craft stuff like this)… It fluffed up a lot more than I expected! I added the suggested ratio of water and lit my little candle in the fondue stand and put the bowl on top. In hindsight, I wish I’d kept track of how long I let it heat up because I started to get impatient when it wasn’t looking very liquidy.

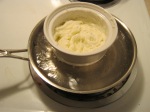
fondue standmelting soapIn my excitement to see it melt, I switched the bowl to a pan of boiling water for a double-boiler effect hoping to see the process sped up a little – Nope. After 20mins of basically no change, I removed the water from the pan and scooped the mess directly onto it (I turned the heat down a little so it wouldn’t scorch). The mess became the consistency of mashed potatoes – ^_~ looked just like them! – and refused to melt any more. Close enough. I scooped it back into the fondue bowl and added 1 tsp ginger powder and 1 tsp anise seeds.

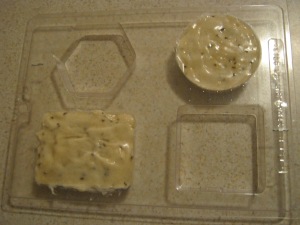
I was originally going to add just ginger, but after taking a whiff of the powder I realized I wanted something more. Randomly sniffing different herbs in my cabinet in combination with the ginger, I settled on anise seed as a suitable partner. I wasn’t following any particular recipe so I just kinda eyeballed what looked good and added 1 tsp each. Without a wooden spoon, I’ve been using a wooden skewer to do all my mixing and it works alright – I’ll have to visit the $ Tree again to see if they have something that’ll work better. Once sufficiently mixed, I scooped the stuff into two plastic molds (^_^ also from my mom).

006I chose the rectangle and the circle (somewhat randomly) and the mix was the perfect amount to just fill both. Because it didn’t really pour, I had a little trouble with air bubbles getting trapped between the soap and mold. Using my skewer I tried to fix them as best I could and let it sit out for a few minutes to kinda settle. Then, as per instructions, I put the tray in the freezer for an hour and a half to let them harden. When that was done, I popped them out of the mold – which was way easy!

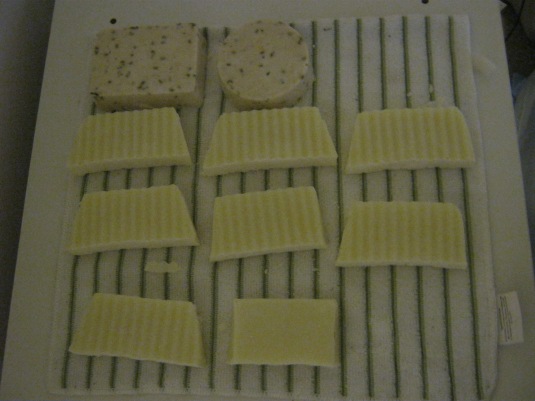
milled soap 1My finished 1st batch of milled soap and the rest of my normal soap pieces (sorry for the poor quality pic). I can’t wait to try out a bar! They’ll be ready April 17th. As you can see, by using two pieces for each practice batch of milled soap, I have 4 combinations left that I can try. Right now I’m planning on at least a oatmeal version and a coffee grinds version (The Complete Soapmaker says that coffee is good for removing food smells from your hands – who knew?). I’m sure I can come up with more additives for the other two batches ^_~ Look forward to it!

DIY Mini Book Press

001 Samples

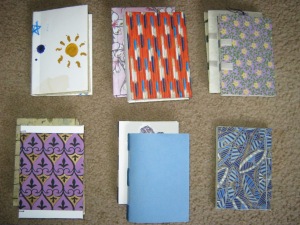
Left to Right Top: Soft cover monastery stitch, Hardcover monastery stitch, French stitch. Left to Right Bottom: Hardcover Coptic stitch, soft cover long stitch, soft cover Japanese stitch

Some time ago (about a year I think) I took an art class that taught me how to bind books. It was one of the most amazingly fun classes I’ve ever taken! I learned 6 different binding styles and made 9 sample books – 3 7/16in. x 5in. For an avid reader like myself, learning how books can be constructed increased my appreciation for the books themselves (even though it’s rare for books to be bound by hand these days).

One of the things that makes a book look nice is flat pages. If you’ve ever tried folding multiple pages at once, you might notice that they tend to pop up at the spine. In class we used a paper-wrapped brick to combat this. While browsing YouTube, I found a diy alternative! Sea Lemon’s video How to Make a Book Press tutorial HERE . The materials were cheap and pretty easy to find (with a couple modifications).

001

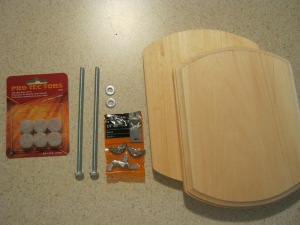
Left to Right: Dollar Tree furniture sliders, 2 hex bolts (6in.), 2 washers, wing nuts, 7in. x 9in. wooden plaques

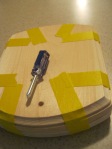
The trickiest part of the whole project was making holes in the wood without a drill… Gave myself at least 4 hand bruises trying to press down while turning a + screwdriver. It took me over an hour to get most of the way through the first of 2 holes. Then my husband took over and finished both of them in a matter of minutes … Not sure if I should be annoyed or pleased … ^_^

004I taped both pieces of wood together – so the hex bolts would pass through both pieces correctly – but the hole I made was angled – ugh. Also it was a bit of a tight fit which was fine for one underneath. To get the top one to slide up and down – somewhat – smoothly, I used a – screwdriver that was slightly wider to enlarge the holes on top. Even so, because of my inability to drill straight down I have to pull the two hex bolts slightly apart as I slide the top up and down.

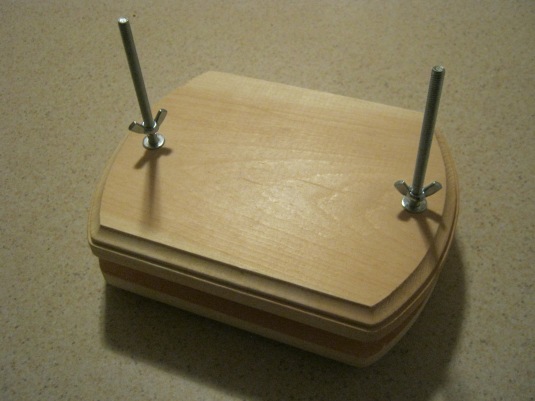
Once the hex bolts were through, I threaded each with a washer and a wing nut. The final touch was the felt sliders on the bottom … and All Done!

finishedBoth wooden pieces are unfinished so I plan to paint/decorate them eventually. Also, the boards I used aren’t long enough for making larger books (like folding regular letter sized paper in half hamburger-wise), but I am excited to make mini books (cutting regular paper in half and then folding in half again, both hamburger-wise). Look forward to updates of that nature ^_~ !

Previous Older Entries